128 S Potomac

This house is probably one of my favorites to date!  It’s located steps away from beautiful Patterson Park near Canton in Baltimore city.  We put a two story roof deck on for maximum city views and hosting party pleasure.  And there’s 3 bedrooms, 3 bathrooms, a beautiful kitchen with lots of storage and a large island!  Plus it’s a historical renovation so we kept all the beautiful window transoms, some original tile and original hardware floors.  Everything new we added to have the same period feel of this 100+ year old row-home.  It’s a gorgeous transformation and I just love seeing my visions come to fruition.  Someone is going to be really happy in this home for hopefully a long time!  Here’s some before and after pictures:

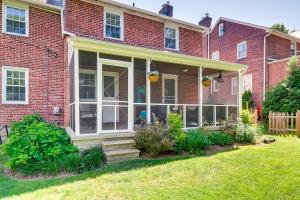
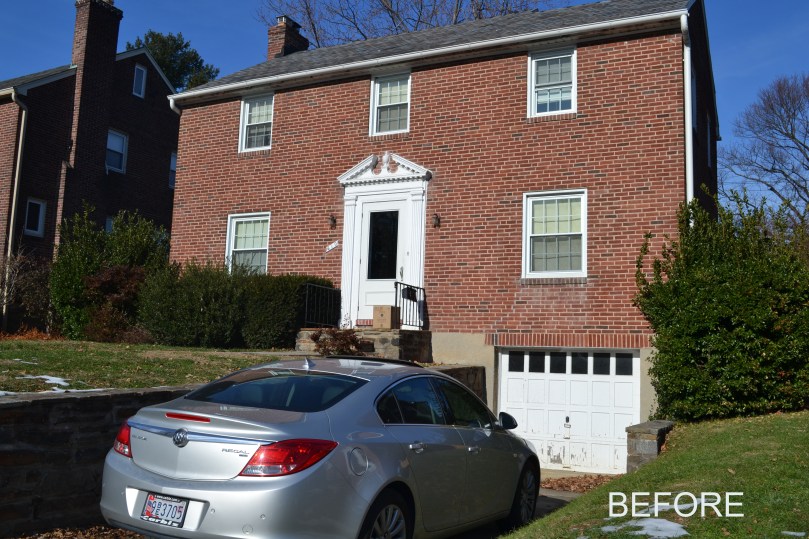
Exterior:  Left is before picture, right is after custom door, tore down the old bay window siding and installed custom picture frame molding, replaced light, house numbers and mailbox.

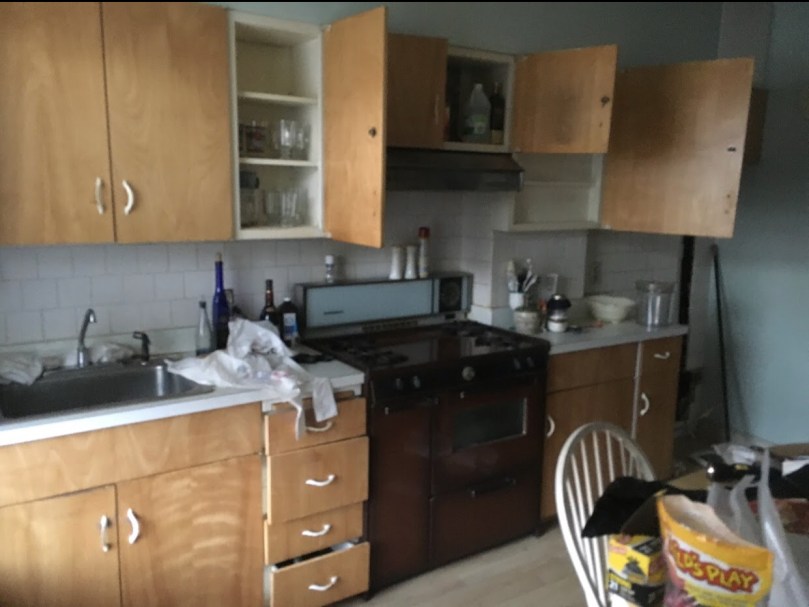
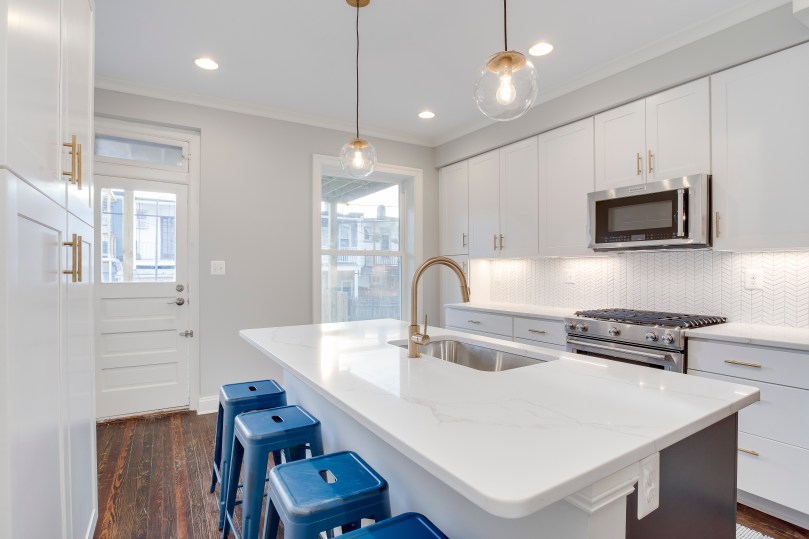
Kitchen: All new cabinets, contrast island painted in Benjamin Moore Hale Navy, brass hardware, globe pendants, chevron back-splash, quartz countertops, refinished hardwood floors and new appliances.

IMG_6439IMG_6440020-128sPotomacStreet-Baltimore-MD-21224-full023-128sPotomacStreet-Baltimore-MD-21224-full024-128sPotomacStreet-Baltimore-MD-21224-full

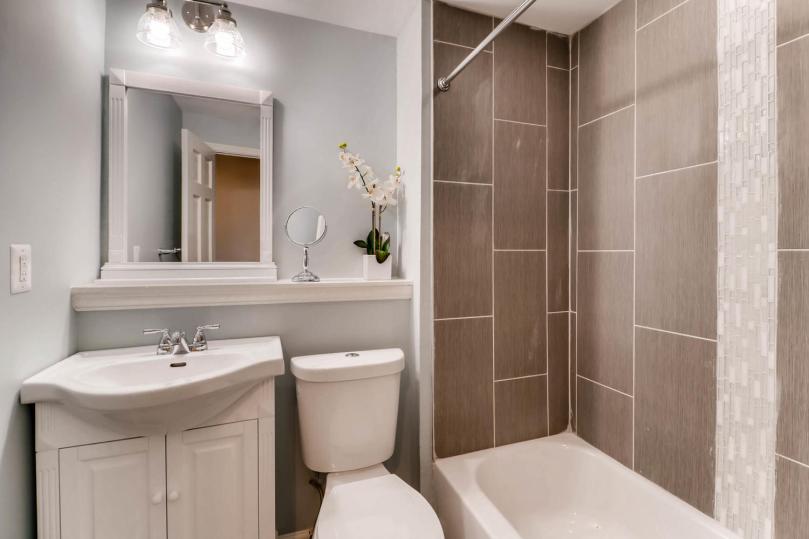
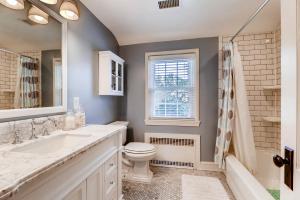
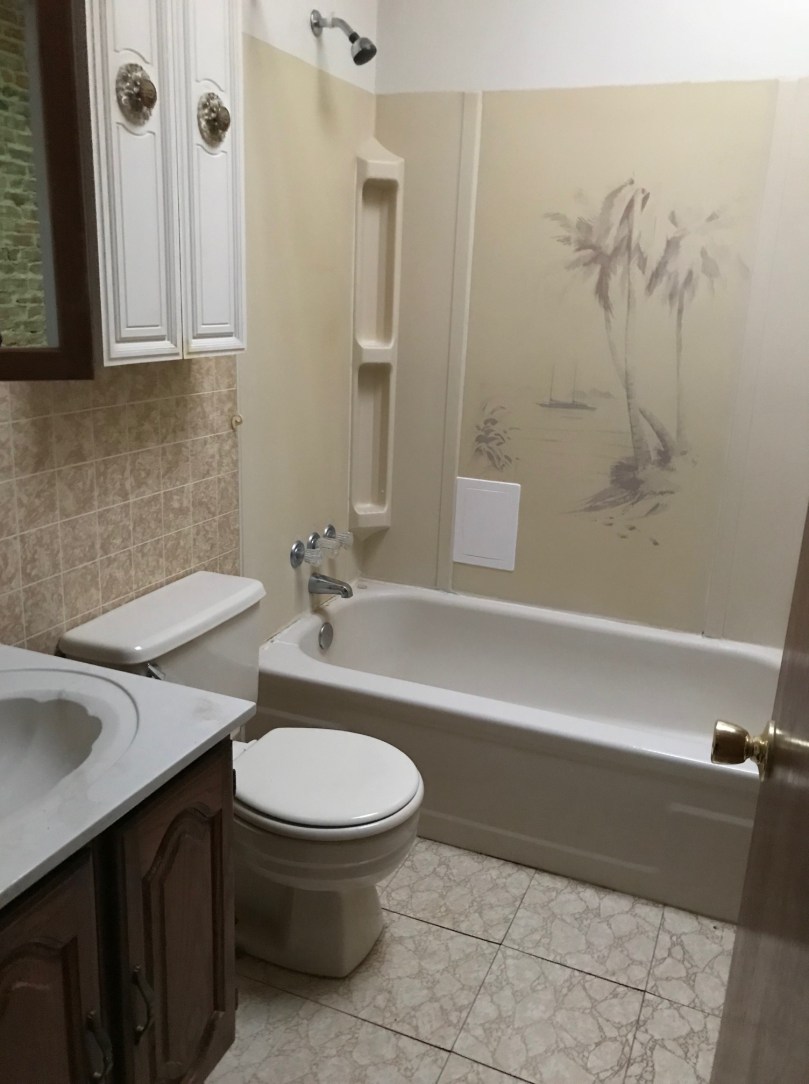
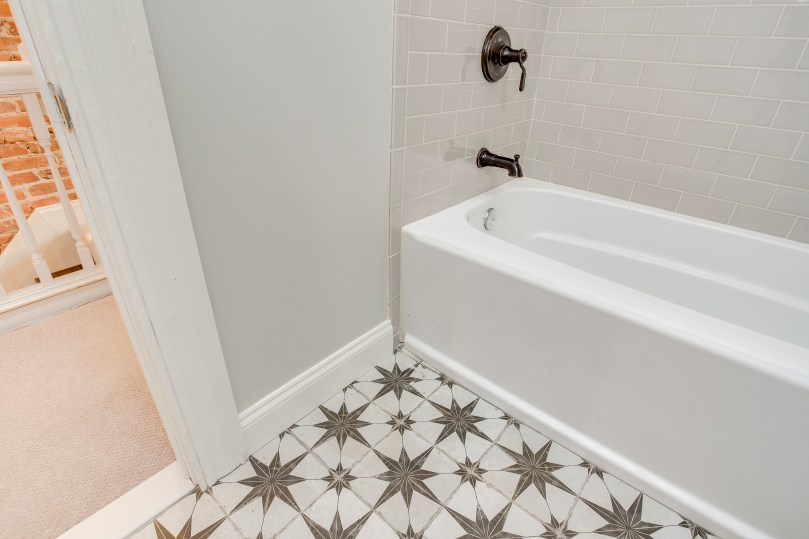
Bathrooms (2 of 3 shown): The upstairs had one very stinky, very dated bathroom, we tore it out and in it’s “place” put in two beautiful bathrooms so that the master bedroom would have an en suite and then there would be a bathroom in the hallway too.

IMG_4350IMG_6988038-128sPotomacStreet-Baltimore-MD-21224-full039-128sPotomacStreet-Baltimore-MD-21224-fullIMG_6987

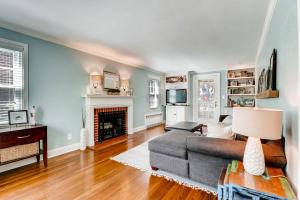
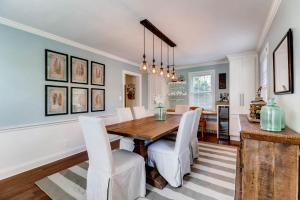
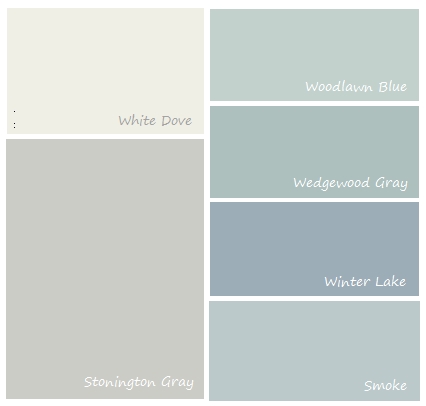
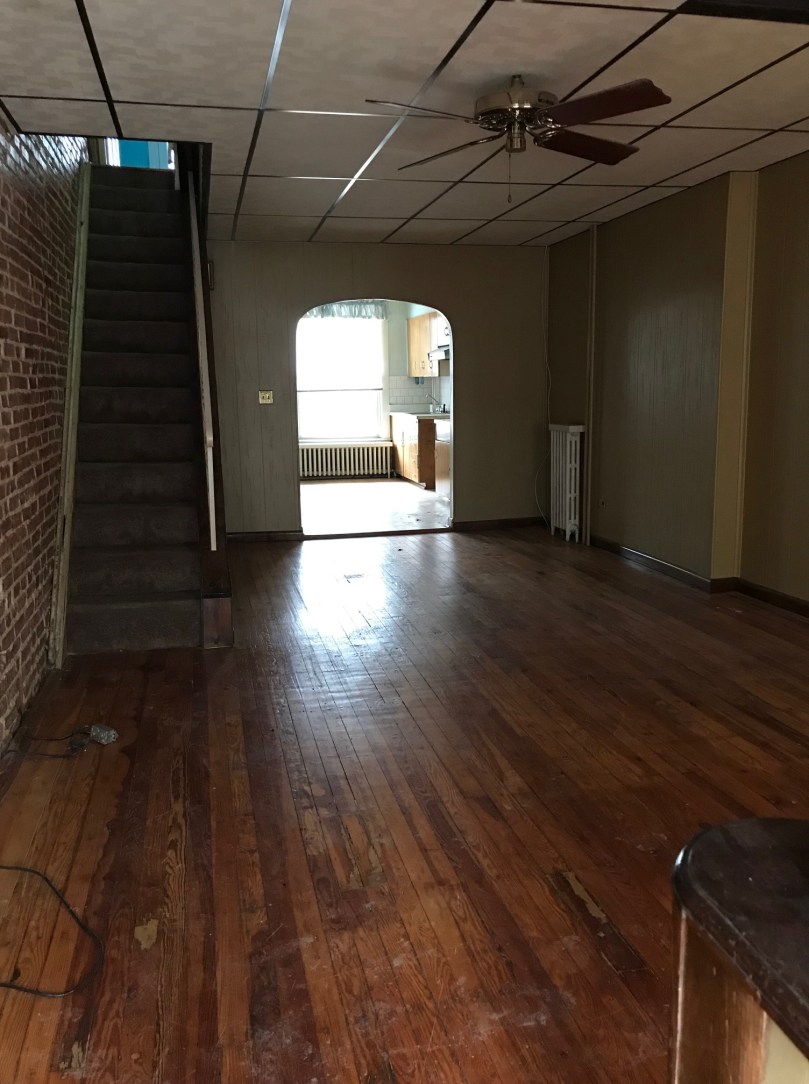
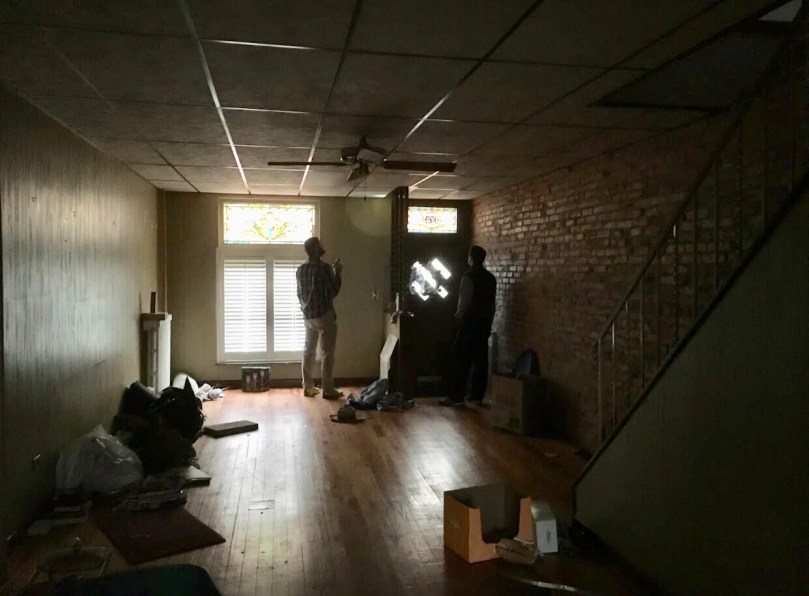
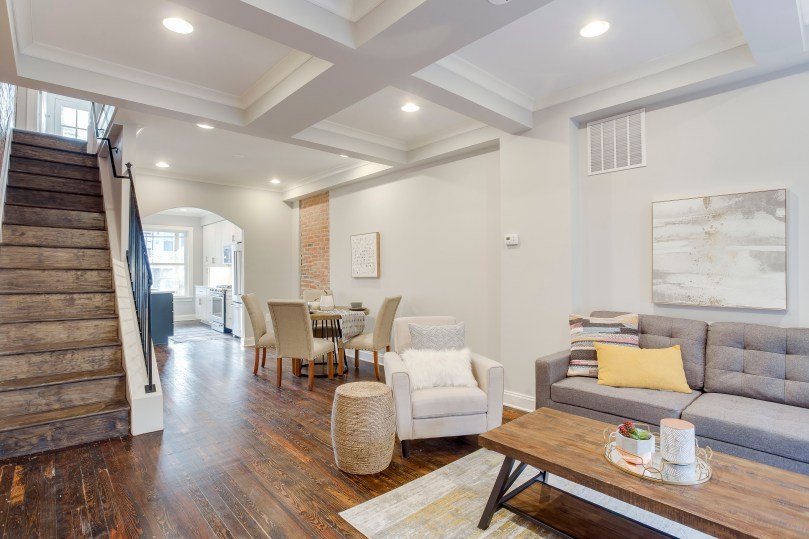
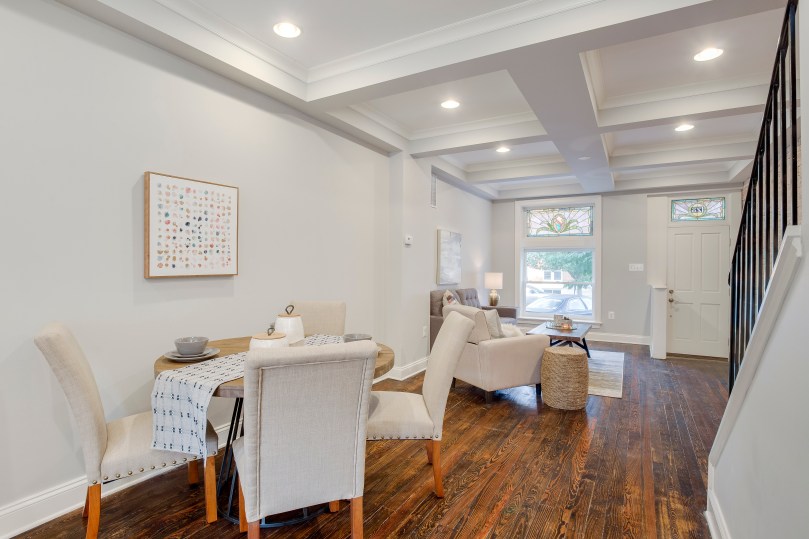
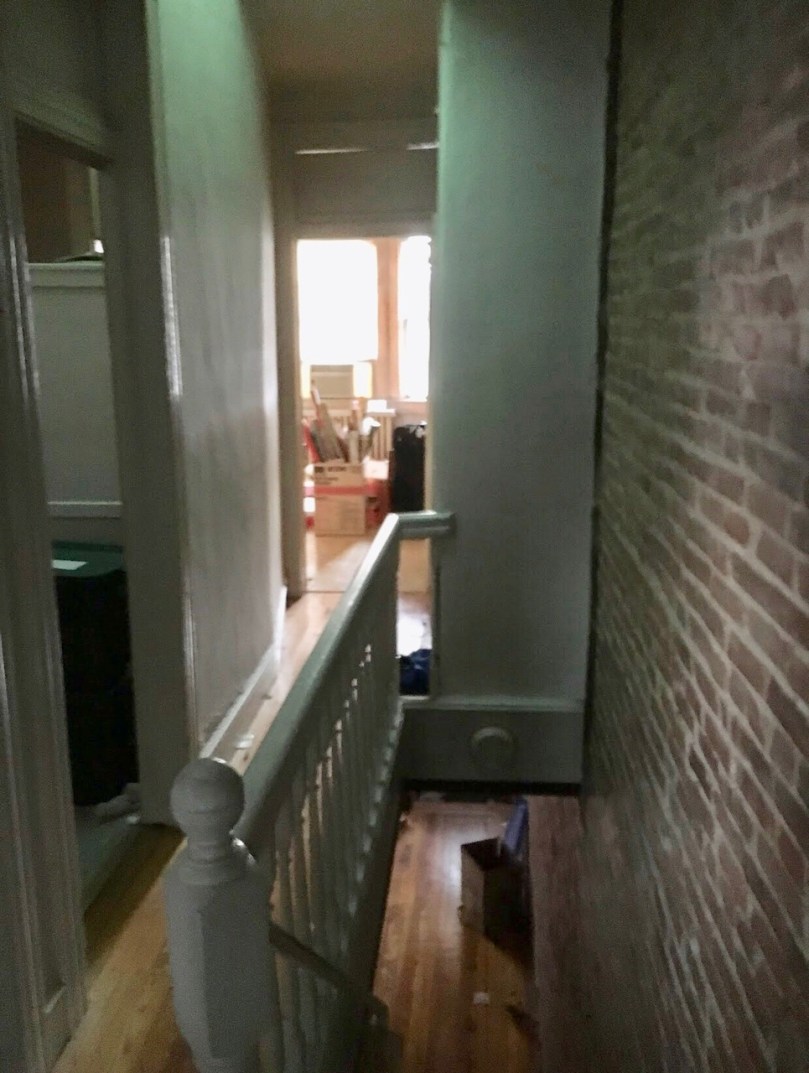
Living room/dining room: We refinished hardwood floors, took out awful drop ceiling and installed gorgeous tray ceilings, exposed and cleaned up brick and painted Benjamin Moore Stonington Gray.

IMG_4347IMG_6441013-128sPotomacStreet-Baltimore-MD-21224-full016-128sPotomacStreet-Baltimore-MD-21224-full

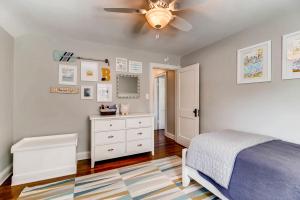
Master Bedroom: Insane transformation – pictures show it all!

IMG_4352IMG_6443033-128sPotomacStreet-Baltimore-MD-21224-full036-128sPotomacStreet-Baltimore-MD-21224-full034-128sPotomacStreet-Baltimore-MD-21224-full

Thanks for reading – until the new project 🙂

317 S Lehigh St.

Here’s a recent renovation property we flipped, it’s a 3 bedroom, 2 bath rowhome in Baltimore.  Originally only a 2 bedroom and one bath home so we added a full bath as well as a third bathroom.  This house had gorgeous pine floors that just needed to be touched up and refinished, it also had pretty exposed beams that we decided to leave exposed.  Keeping with those finishes, we decided to do a decorative tin ceiling in the kitchen which I think turned out gorgeous and we used a tile flooring in the kitchen that looks like rustic wood.  Overall, the home has a modern-industrial feel and I just love the way it turned out.

Kitchen prior to renovation but was already gutted by the time I got the picture:

IMG_1450

Kitchen now:

317 S Lehigh St Baltimore MD-large-010-11-Kitchen-1500x1000-72dpi317 S Lehigh St Baltimore MD-large-008-7-Kitchen-1500x1000-72dpi

Living/Dining space before:

IMG_1451

Living/Dining space now:

317 S Lehigh St Baltimore MD-large-006-5-Living Room-1500x1000-72dpi317 S Lehigh St Baltimore MD-large-005-2-Living Room-1500x1000-72dpi

Here’s the only bathroom the house had prior to renovation:

IMG_1454

And here’s that bathroom now as well as the additional master bath that was added:

2nd Bathroom

317 S Lehigh St Baltimore MD-large-016-9-2nd Floor Master Bathroom-1500x1000-72dpi

Paint colors-Living room, dining room and bedrooms (not pictured) are all Sherwin Williams Light French Gray.  Bathrooms and kitchen are Benjamin Moore Smoke.  All the trim is Benjamin Moore White Dove.  Front door is Sherwin Williams Stolen Kiss.

Thanks for reading, our next flip should be completed by the first of the year!

Happy Holidays!

Baltimore row house reno – Lehigh

Another completed project!  This row home has so much natural light and is quite spacious considering some Baltimore row homes can be narrow.  I love how open this house is and how large the kitchen is!  The room off the back is an added bonus for a mudroom.  Here’s some of the before and after photos on this gorgeous row home.

Before (obviously):

And now completed and under contract:

Next chapter

What do home renovation enthusiasts do when there aren’t any projects left to do on their home?  Well I guess we could move, but we’re just not ready for that yet so we took the plunge and started a company!  The official company website is klrdevelopment.com however I figured what better place to show the actual rehab before and after photos than my blog.  So without further delay, here’s a gorgeous home that recently sold in less than a week and took about a year to complete.  I am equally obsessed with this kitchen – the size, the island, all those cabinets! – as well as the master bath – the shiplap, that huge walk in shower, the tiles, the vanity space!  I also staged the home to define the spaces, given it’s such an open floor plan.

It is a large, rancher-style home, very dated and very dark.  The rooms were small and closed off and our plan was to open it up and lighten it up to really showcase how big this house is and how much beautiful potential it has.  So here you go, in no certain order because there are so many before pictures…

And here’s how it looks now completed and beautiful…

For paint colors we used Benjamin Moore gray owl and white dove. The lighting all came from Wayfair, and we used quartz in the kitchen for countertops.  Now on to the next project!

That’s a wrap.

For now our home is complete, there’s always something to redecorate and we’re thinking of moving the boys into the same room shortly so I’ll have fun with that but for now I think it’s a wrap on renovation projects.  I thought I’d conclude with a photo gallery of where we are now, almost 3 years into this house.

Now, we can focus on renovation projects outside of our personal home…stay tuned!

Completing our home

After 2 years in this house there isn’t much left to do, one of the most recent projects my husband completed is adding to the front of our home a small roof over the front door giving the house some dimension and providing us a covered entrance-way (perfect for those rainy days when I’m carrying in two kids and all their stuff after school).  Here’s the before and after pictures of our home-and here’s the original post on transforming the exterior of this once run-down home. Thanks for following us on this journey!

When we first purchased the house:

DSC_0946

After adding shutters, painting front door and garage door, and adding landscaping:

IMG_4066

img_3805

fronthouse112016

Porch Paradise

A project my husband completed before the holidays was the screened in porch. It’s the perfect space to hang out with family and friends without the worry of mosquitoes attacking our babies or flies getting to our food. Adding the small sectional and extra chairs/rocker has also increased our living space, it’s nice to play out there with the kids or when they are napping take a book out.

If you recognize the rug – it was an indoor/outdoor one that I had in our living room.  Moving it out to the porch gave me the perfect reason to take advantage of a rug sale at Pottery Barn.

Before:

Neighborhood stray cat enjoying the porch
Neighborhood stray cat enjoying the porch (overgrown bushes made it impossible to see beyond the porch)

Now:

IMG_1705

Bathroom Rehab

Continuing the basement renovation meant rehabbing the second full bathroom – fortunately, all the important elements were there which made it easier to complete.  I knew I wanted to do a board and batten on the walls and use travertine in the shower so after that there wasn’t much to decide on except paint color. Since we had some leftover from our bedroom reno, we went with Benjamin Moore Smoke on the top half of the walls and painted the board and batten the same color White Dove which we used through-out the house on the trim.  Gavin made all the board and batten trim by hand and installed all of the tile in the shower and I just love how it turned out.  We ordered a glass shower door which is in but not installed yet but this way I can share a better picture of the tile work without the door on.

Before pictures:

DSC_1001

DSC_1003

DSC_1002

After pics:

IMG_3633

IMG_3635

IMG_3636


Basement Reno

It’s been awhile since I posted a renovation project but that doesn’t mean we haven’t been busy – in addition to renovating the basement and a second bathroom, we had our second little boy!  Brady’s room is now a big boy room and Mason’s nursery is almost finished.  Additionally we’ve been tackling outside projects like landscaping which I’ll share soon.

The basement renovation has been a game changer in our house – it’s so nice to have a designated toy area for starters!  My husband designed a lay-out that would give us a living room area for us to relax and for kids to play, a laundry room, storage closets and a full bathroom.  We decided to keep the exposed beam ceiling open because we loved the rustic feel and it makes the basement feel more open and airy.  For paint color, we went with Sherwin-Williams Heron Plume because it’s a cool white with a hint of gray to it so it doesn’t overwhelm the small living room space.  For lighting, to keep with the industrial/rustic feel we used antique bronze track lights.  From the attic renovation, Gavin saved original wood planks that we then incorporated into the design.  The hand railing and trim around the inside window cases is all planks of this reclaimed wood.  Additionally, Gavin made shelving units under our television from two planks.  Here’s the before and after pictures of our amazing basement renovation (all the praise really belongs to my husband on this one!):

Before:

DSC_0997

During (my husband’s little helper is hard at work):

IMG_2602

IMG_2603

Now:

IMG_2839

IMG_2835

IMG_0672

IMG_0813

Check out the next post, Bathroom Rehab, to see continued work on our lower level.

Paint Colors

Choosing paint can be such a challenge – there are so many options!  A lot of people have asked me what colors we painted certain rooms so I thought I’d share with you our whole first house color scheme and then our current house pallet so far…we still have a bathroom and a basement renovation that haven’t even began so I’ll add those colors to the chart once we’ve completed all the rooms.

Our first house:  One day I’ll blog about this house renovation but for now I’ll just quickly explain that our first home we stumbled across when my father-in-law was asked to help refinish the floors to get it on the market.  He told us about it and the rest is history.  The floors were refinished but in the same warm oak they originally began. When we started our remodel, we carried the warmer tones into our two bathroom vanities and renovated the kitchen using cabinets with a medium brown finish and granite that also picked up those warm tones (Saint Cecelia).  After looking at different paint swatches, I went with Martha Stewart paint. There was a lot of paint color options that were modern but warm which would compliment our house.  I think it’s easier to select complimentary shades when using one manufacturer.  Here’s our old color palette:

HarwoodPaintcondensed

In our current house: Since we refinished the floors ourselves we decided to go with a darker stain this time around. I love the way the floors came out and their darker color means I could use a cool color palette.  We decided on a kitchen and main bathroom with white cabinetry and marble tops accented with chrome & polished nickle hardware.  For paint this time I saw a Benjamin Moore shade I loved (Smoke) and so following my “rule” of using coordinating shades from the same manufacturer, all of these paints we’ve used so far are from Benjamin Moore.  Here’s our current color pallet:

Image

Paint is the quickest & cheapest way to transform a room so take a chance and pick a color you like, if it doesn’t turn out the way you hoped you can always repaint it.  Good luck!

Entranceway

Like all the rooms in our house, our entranceway is evolving too.  We have some accent pieces there that sort of landed there on moving day and I’ve kept them there for lack of a better option at this point.  I’d like to find a small quatrefoil mirror to hang above the blue accent chest and I’ll probably move the accessories around but you can see how the refinished floors look, as well as how our staircase turned out with the painted risers.  We updated the pendant light and painted the walls Benjamin Moore Stonington Gray.  We also added crown molding which is painted in White Dove (so are the risers).

Hallway before reno

DSC_0994

Old light fixture

Here’s our progress:

Front door

DSC_0407

crown molding

Curb Appeal

There’s nothing like driving up to your house and falling in love with it all over again!  Curb appeal is a major component to that feeling and our house just didn’t have it when we bought it.  Here’s our list of TO-DO’s as far as the front exterior is concerned (the back is a whole other project that I’ll get to in a future post) and you can see what’s been crossed off the list and what’s left to do still:

1. Add shutters  (completed: we decided to go with classic black raised panel shutters)

2. Landscaping: removing all the old bushes and putting in new bushes, annuals, perennials, and a tree (possibly Crepe Myrtle)

3. Scraping and repainting trim and garage door white

4. Painting front door (We choose a light gray but one day I may change this to something more bold like a red.  I knew I didn’t want to keep it white and I wanted to keep it neutral for now since this is the original door and we had to sand it down and apply a few coats).

5. New light fixtures

6. New address plaque

7. New mailbox

8. Repainting black handrails (maybe replacing them one day)

9. Expanding and paving the driveway (it’s very narrow and hard to get our son in and out of the car when parked there)

DSC_0946

Here’s the updated image.  We’ve hung flags and added a few flowers, mostly in pots until we figure out our landscaping plan and come up with the money to complete it.

DSC_0387